Air Filter Element: Service and Repair
Air Filter Element
Removing
with Engine Code CBFA
- Disconnect the hose leading to the secondary air injection pump motor from the air filter housing.
Continuation for All
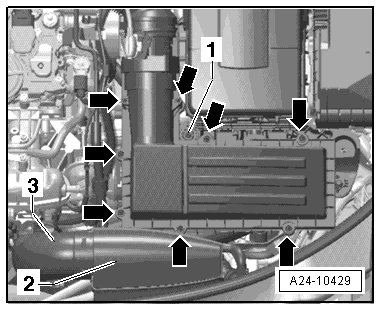
- Remove the bolts - arrows - from the upper air filter housing.
- Lift the upper air filter housing and remove the air filter element.
Installing
Tightening specifications, refer to => [ Air Filter Housing Overview ] Air Filter Housing Overview.
• Always use an original equipment air filter element.
• Hose connections and charge air system hoses must be free of oil and grease before installing. When installing, do not use any lubricants containing silicone.
• The air filter housing must be clean.
• Secure all hose connections using hose clamps appropriate for the model type. Refer to the Parts Catalog.
• Note the following when blowing out the air filter housing with pressurized air: To prevent malfunctions, cover the critical air flow components such as the Mass Airflow (MAF) sensor, connecting pipe, etc. with a clean cloth.
• Observe disposal regulations!
- Check the MAF sensor and connecting hose (intake air side) for salt residue, dirt, and leaves.
- Check the connecting pipe from the air duct for dirt.
- Remove the snow screen - 1 - and clean it.

• The snow screen is not installed in all vehicles.
- Clean the water drain - arrow - and the lower air filter housing.
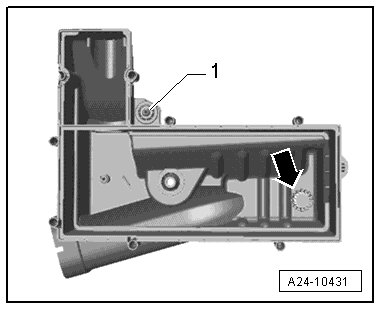
- Make sure that air filter is properly centered when placed in the lower air filter housing.
- Set the upper air filter housing onto the lower air filter housing, without using much force. When doing this, make sure that the upper air filter housing is not placed crooked on the air filter element. Check the sealing lip on the air filter element.
Further installation is in the reverse order of removal.